
Useful Links for Tenants
These are what we have found to be the most helpful guidelines for tenants when using the building and its amenities. Let us know if you need help!
These are what we have found to be the most helpful guidelines for tenants when using the building and its amenities. Let us know if you need help!
Community room access is free for Third Street Center tenants. Here are the instructions for tenants to use when reserving a room.
We use a simple Google calendar for tenants to make reservations in the Calaway Room, The Board Room and the Round Room. If you need to schedule Community Hall, please contact Colin first as there is a small fee for the use of this bigger space.
If you need to schedule rooms and have not been invited into the new calendar, send an email to Colin, and we’ll get you set-up. 🙂
After you accept the invitation, Google will place the Third Street Center calendar in the “other calendars” section of your own calendar (see below). (If you don’t use gmail, let us know.) When you book a room, make sure to select the Third Street Center calendar from your menu of options so it shows up on the TSC calendar and not just your own. 🙂
There is a delay between the google calendar and the webpage, so if you don’t see your meeting on the webpage (and it is a public meeting you want others to see), send an email and we will check it out. Let us know if you need any help setting things up or run into problems.

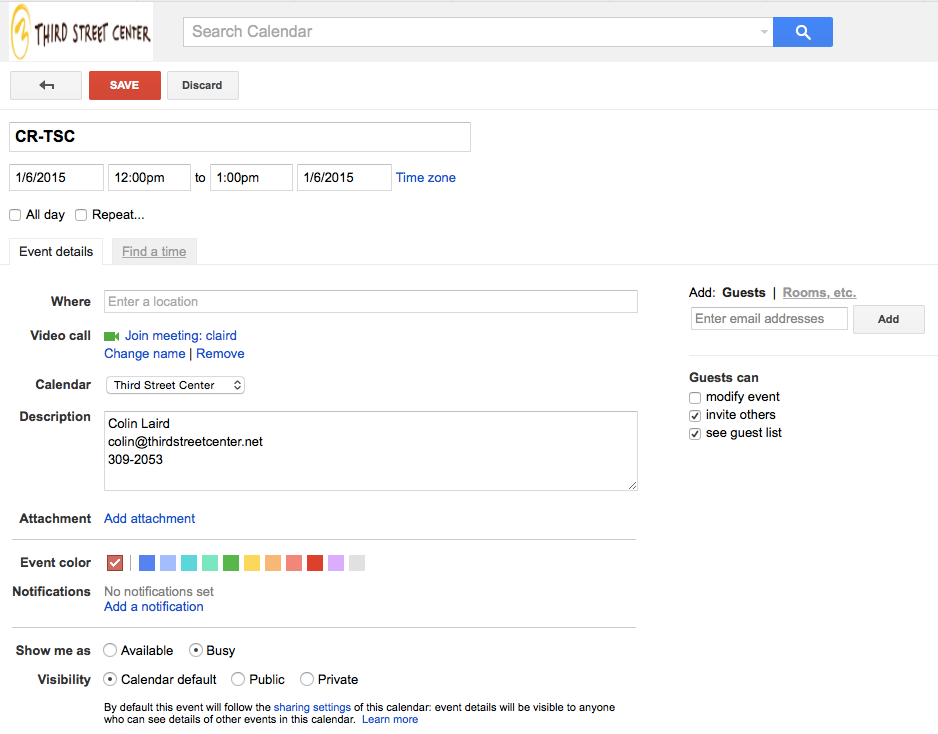
Please use the following format when reserving a room:
It is also helpful to include contact info in the description in case someone needs to get it touch with you about your reservation.
As you will see in trying to book a room, Third Street Center is a busy place. The rooms are a shared resource that we want every tenant to benefit from. If you make a reservation that occurs each week or each month, please, please, please, check routinely that you actually need the room and delete the reservation if you don’t need it. A reserved room with no one in it is a scenario we want to avoid.
If you see a space is booked, feel free to reach out to whomever booked it and check on their flexibility. Sometimes the shift of meetings and spaces is easy.
Remember to leave any room you use clean and organized for the next user (which could be you:) This means putting chairs and tables back in their original locations, turning lights off, putting AV away, lifting blinds if you lowered them, and cleaning up food, etc. if you had any. Paying it forward will come back to you.
Include set up and clean up in your reservation. Doing so takes pressure of the exchange between users. For example, if your event is at Noon but you need to set the room up for 30 minutes, please start your reservation at 11:30am.
Contact Mark or Colin with any set up, AV, or scheduling questions.
Note: these instructions are updated for the new printer IP address. If you are using a MAC/Apple computer, you will need to delete the old Ricoh printer from your computer and then set it up again using the new IP address. If you have a PC you should be able to just change the IP address for the Third Street Center printer that you already and the software will update. If doesn’t work, you can follow the full install instructions.
The new printer address is 69.39.3.95
FOR WINDOWS
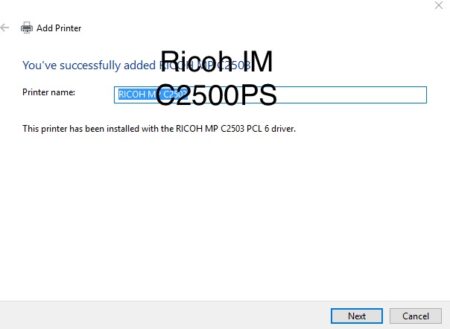
You should get a box like this if you are successful. Now onto actually printing a document using your passcode.
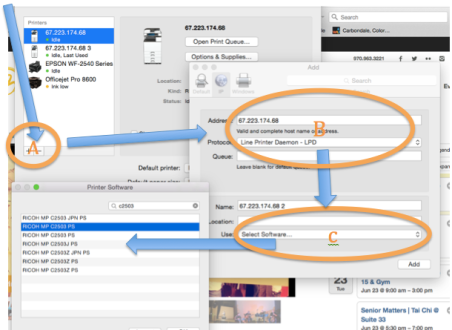
FOR MAC
The Third Street Printer should now be added to your list of printers.
MICROSOFT WORD or PREVIEW
GOOGLE DOCS, GMAIL, ETC.
Third Street Center
520 South Third Street
Carbondale, CO 81623
